MENU PATH
POS App: Side Menu > Device Settings
Device Settings
These are the settings that must be done by the operator at the device level, as each device might need its own settings.
We have categorized these settings in the following tabs:
PRINT TAB
On this tab, you can define settings for your connected “Receipt Printer.”
Paper Size
You can change the paper size based on your printer’s paper width. The normal receipt printers are 80 mm, but if you are using smaller printers or printers that print fewer letters in a line and you see that parts of the right side of the printout are missing, you can choose 57 mm instead of 80 mm.
Print Format
You can select between “Text” and “Image”.
Most of the Point Of Sale Software in the market only have a “Text Printing” feature.
In the LimeOrder POS app, we also offer “Image” format of the receipt too.
The image format uses less paper to print and has higher quality, but the only cons are that it takes few seconds, depending on the device’s speed, to generate the receipt image to send to the printer.
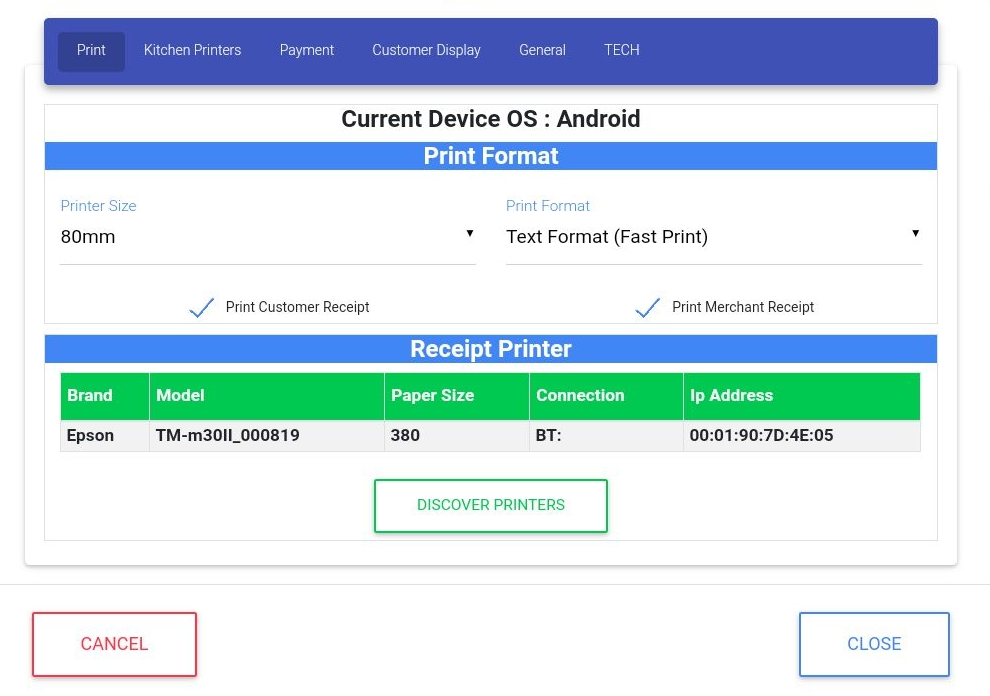
Print Customer Receipt & Print Merchant Receipt
If you have defined “Merchant Account & Integrated Payment terminal” in the POS-Admin app and also defined here in the “Payment” tab, what is the model of the connected payment terminal, then you can set it in the payment terminal where you want the payment receipt to be printed ( You can set in the payment terminal settings where the receipts to be printed, Terminal only, ECR Only ( means POS app ) or both.
If you are using Ingenico Desk 5000 ®, these settings can be reached here on the device: ” Settings > Misc Settings > Semi-Integrated > Receipt Printing “
If you have chosen to print them on the payment terminal, then you have to leave these two checkboxes unselected. Still, if you have set in the payment terminal not to print the customer and the merchant receipt, then you can alternatively check these two options to print the customer receipt after the order receipt is printed and after a paper cut, LimeOrder Point Of Sale app prints the merchant receipt too.
Discover Printers
Note: Before using “Discover Printers” in order to find the connected printers, you have to first “Download & Install LimeOrder Print Service” that connects your app to your printer.
To define in the system what is the model of the printer that you are using to print the order receipt, you have to select the “Discover Printer” feature.
By selecting the “Discover Printer” button, the system shows you dialogue and asks you the printer brand that you are using; you can choose “Epson®” or “Star®.”
After choosing the printer model , press the “discover” button again.
The system starts searching for the printers close by; after that, it shows the list of the discovered printer as shown below. You can see the brand of the discovered printer in the first column, the model in the second column, and the connection to the printer in the fourth column (e.g., BT Means Bluetooth ).
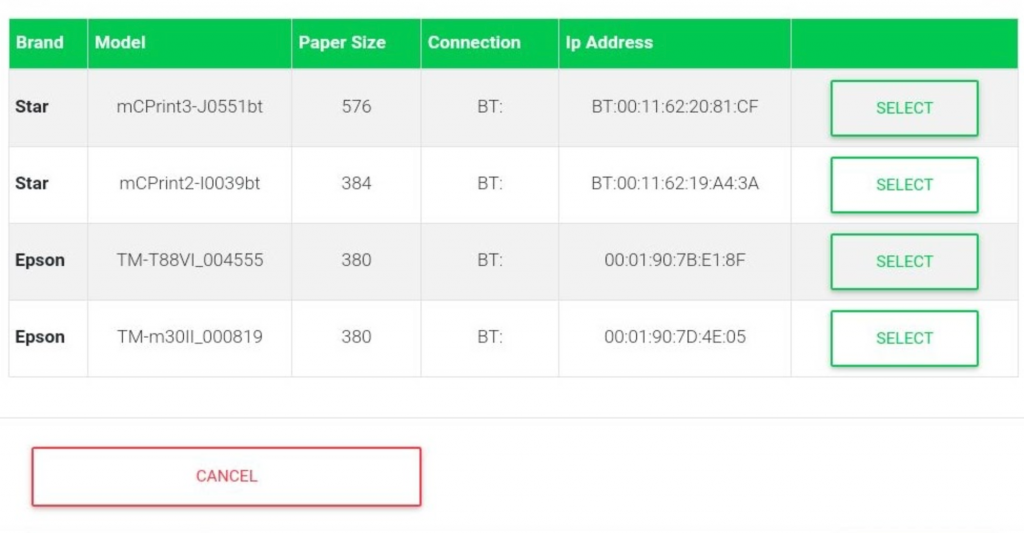
Select the correct printer from the discovered list and from now on whenever you print a bill, the system uses this printer to send the print receipt.
KITCHEN PRINTER Tab
By selecting the second tab in the device setting form which is the “Kitchen Printer”, you will the this form:

If you have defined “Kitchen Printers” in the POS-Admin app before, to define in the system when sending the orders to the kitchen, which printer to use for which kitchen, you have to discover the close by printers again assign the appropriate printer to the appropriate kitchen.
Select the “Discover” button on top of the form; the system searches for all the available printers close by, including printers that are connected to your network, USB printers, and Bluetooth printers.
NOTE: We highly recommend using only network printers for the kitchen printer as the most reliable connection is the Ethernet cable connection. You have to connect your printer to your router by cable ( Please consult your network administrator for more details )
After printer discovery is done, a new window will be shown as below:
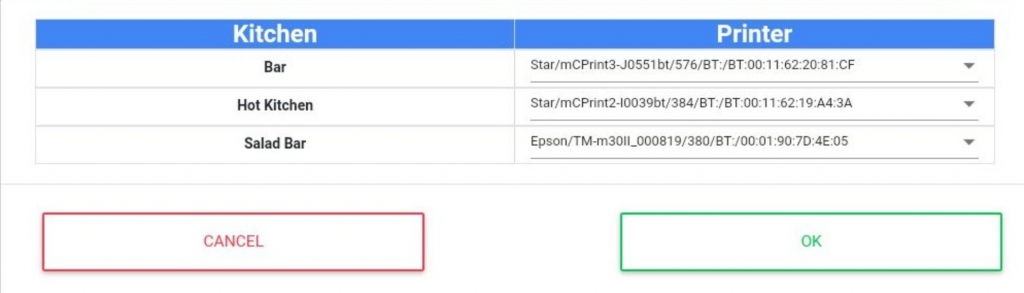
Here you see a list of defined kitchens in the first column.
You have to assign one of the discovered printers from the second column to each of your kitchens.
Note: Before using “Discover Printers” in order to find the connected printers, you have to first “Download & Install LimeOrder Print Service” that connects your app to your printer.
Payment Tab
In this tab, you have to choose which Payment terminal you are using, select one of the integrated payment terminals.

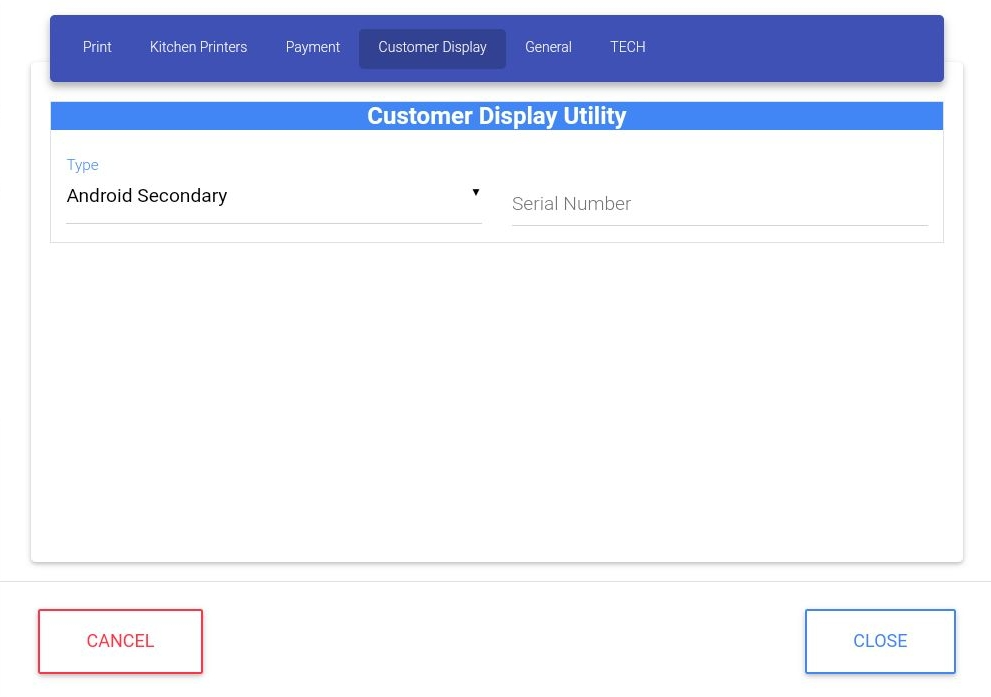
Customer Display Tab
If your device is equipped with a customer display, you can choose one of the integrated customer displays in the LimeOrder.
® Ingenico is the registered trademark of Ingenico Group
® Star is the registered trademark of Star Micronics Co., Ltd
® Epson is the registered trademark of Seiko Epson Corporation